 Steering gear repair – Opel Kadett
■ On both ends of the gearbox housing, remove the rubber inserts of the clamps and the seal on the end wall.
■ Remove both wire ties from each rubber cover
■ Pull the rubber covers and the sheet metal sleeve off the gearbox housing
■ Remove the sliding guide and guide from the rack.
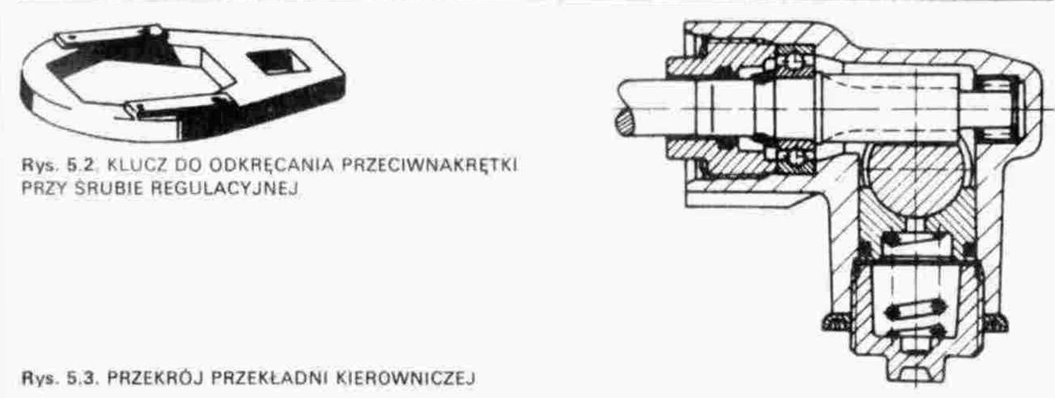
■ Use a wrench to loosen the sheet metal locknut and remove the adjusting screw
■ Take the spring out of the bore
■ Over the input shaft mounting bolt (with drive gear) pull out the circlip and unscrew the screw. The screw seal is replaceable
■ Take the input shaft and the toothed rack out of the gearbox housing. The shaft is a spare part only complete with ball bearing.
■ Using a tool inserted through the hole on the removed shaft, press the rack guide outwards. The seal removed together with the guide must be replaced.
■ Press the cover plate out from the inside of the housing
It is not allowed to remove the sliding bushes of the toothed bar and the needle bearing of the input shaft from the gear housing.. If there is damage to bushings or bearings, the entire gear housing must be replaced After dismantling the gear components, check them and, if necessary, replace them.
During assembly, the input shaft gear and rack must be lubricated with gear lubricant. The interior of the housing between the support points of the rack must be evenly filled with the same amount of grease 50 g.
The input shaft and the toothed rack inserted into the housing should take the position shown in fig
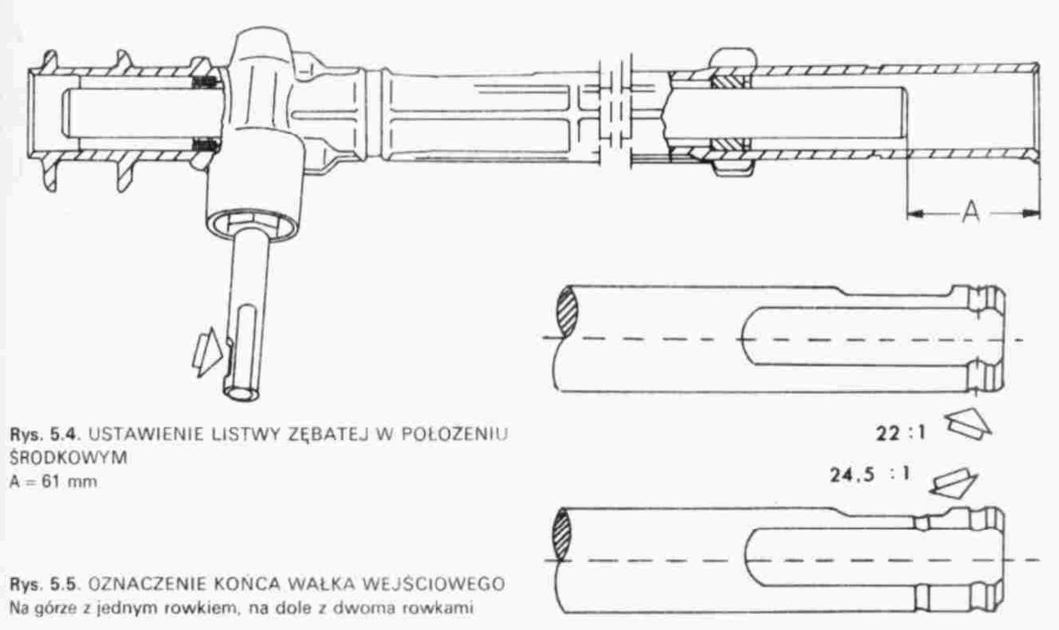
Distance A must be 61 Mm, and the marked recess in the shaft must face to the left. The transmission is now set for straight-ahead travel.
The end of the input shaft is marked with grooves, informing about the size of the shift (Lynx. 5 5):
1 groove - ratio 22:1. the rack has 28 teeth,
2 grooves - ratio 24,5:1, the rack has 32 teeth
Fill the space between the input shaft mounting bolt and the ball bearing of the drive with anti-friction bearing grease, waterproof. The bolt is then tightened with the prescribed torque and secured with a sheet metal ring.
To align the steering gear, two spacer sleeves must be prepared. These sleeves, together with the guide and the sliding element, are screwed with the screws used to fasten the steering rods.
Insert the guide and the spring into the bore of the adjusting screw, then tighten the screw as far as it will go. The tightening torque of the adjusting screw should be 5 Nm, and the gearbox must be in the straight-ahead position. Then the adjusting screw should be turned back an angle 20 – 40° .
The rack should now slide easily throughout its range of motion. Secure the adjusting screw with a lock nut Press a new sheet metal hood on the shorter end of the gearbox housing.. Secure the covers with wire bands, the ends of which should be at the top of the housing. The covers must not be twisted when fitted
Put on the rubber inserts with clamps, the inner rounding of the clamp flange must point downwards. The cutout in the rubber seal of the gearbox to the body must be on the zebra side of the housing. Attach the steering gear.
Check after installation, whether the gear is in the middle position and should be checked during a test drive, whether the turned wheels return to driving straight ahead. If me. the steering gear must be reset, which requires its removal.
Replacing the rubber covers of the gears
In order to replace the rubber covers of the steering gear, it is necessary to remove it from the car.