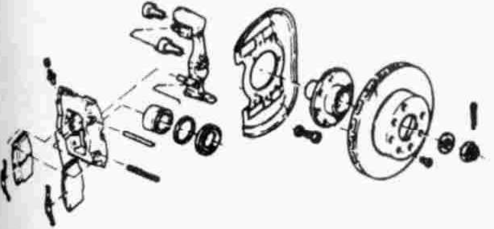
 FRONT WHEEL BRAKES
Replacing the friction inserts
■ Loosen the bolts of the front wheels, lift the front of the car and place it on the stands. Secure the rear wheels.
■ Remove the front wheels, marking their position in relation to the hubs.
■ The condition of the friction inserts can be visually determined in the caliper. The cladding thickness may not be less than 1,5 Mm. The inserts must always be replaced in pairs on both sides of the axle.
■ For easier work, turn the steering wheel in the appropriate direction.
■ If the brakes are fitted with a friction lining wear sensor, then remove the sensor cable from the insert. The cable and sensor are replaced together with the friction insert
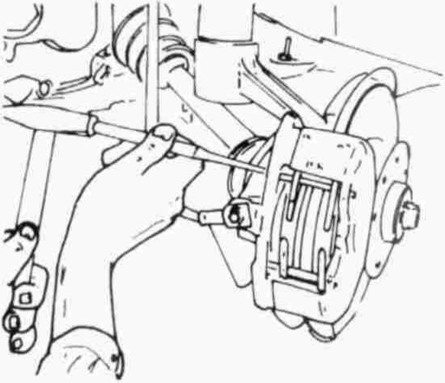 ■ Use a suitable mandrel to punch out the friction insert guides. Knock out the second guide carefully, that the retaining spring does not pop out
■ First remove the outer friction insert. The inner insert can be removed from the clamp by levering its two handles with a screwdriver
■ Clean the inside of the clamp. Due to the presence of asbestos, do not use compressed air. If necessary, use a brush and a bicycle pump.
■ Retract the plunger into the caliper, pressing with a wooden block. Pay attention when doing so, if the brake fluid level in the tank does not rise too much. If necessary, remove excess fluid (e.g. syringe).
■ Fit new friction inserts, which must slide easily.
■ Insert the guides into the clamp body yes, so that their slots are facing each other.
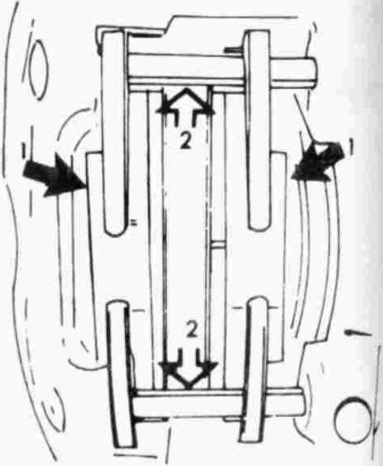
■ Insert the insert retaining springs and drive the guides into the opposite holes of the caliper holder.
Screw the wheels into place and lower the car. Press the brake pedal several times, pressing the friction inserts against the disc brake rotor.